Apparently I reviewed the same product twice =P
This product was the Shiseido hair mask.
Silly me, sorry about that. I don't keep a list or anything, it's all in my head, so I must have forgotten that I wrote one already! Hopefully I didn't annoy anyone by doing a double review, but I'm sorry about it, I'll keep better track of my stuff! X(
IF you are wondering which one to read or which one is better, they both contain the same information, a bit different, but pretty much the same.
Thanks for reading my blog and sorry for the inconvenience.

Thursday, June 7, 2012

Wednesday, June 6, 2012
Let's talk about Eyeliner!
Hiii guys!
Today I will be talking about Eyeliner!

What is eyeliner?
Eyeliner is a product that is used near the lash line to make your lashes appear, thicker, darker, and fuller. It is usually used to make the eyes appear bigger, rounder, and/or longer.
Do I need eyeliner?
Haha, nope! You don't have to use eyeliner if you don't want to. =) It's your preference! Some people like to make their eyes look bigger or give their eyes a more defined appearance.
Types of eyeliner
There are 3 main types of eyeliner: pencil, gel, and liquid. They all come in a variety of colors and can be matt or shimmery. You can also use eyeshadows to apply eyeliner!
In general pencil is the easiest to apply and liquid is the hardest. I wouldn't know, because I started off w/ liquid eyeliner =P.
However liquid and gel liners tend to last longer than pencil or powder/eyeshadow liners.
Pencil and eyeshadow give the most natural look while gel and liquid give a stronger, harder, and more defined look.
How to apply different types of eyeliners
Generally, you want to draw your eyeliner in a way that it is thicker on the outer corners of the eyes and thinner on the inner corners. This gives a more flirty and enlarging effect. You can also wing out your eyeliner to make it more flirty as well. Winging out the eyeliner is also great for older people because it helps lift and brighten the eyes.
If you want something more natural, stick with a thin liner that doesn't change much in thickness and stop where your eyelashes stop.
Pencil eyeliners are of course applied with the pencil. If you are comfortable with this, you can draw long strokes however if you are new, shorter smaller strokes work just as well. Just stay in a uniform direction and take your time =) You will learn fast! I have seen people melt their pencil eyeliners with a blow dryer and use an eyeliner brush to apply the pencil liner in a more gel form.
Gel liners are applied with eyeliner brushes or a Q-tip. When you use an eyeliner brush with a gel, it doesn't matter what kind of brush it is, just make sure to use small gentle strokes and gradually connect them together. Some people like to use a Q-tip for the lower lash line because it gives a softer look. Many people also set their gel liner with an eyeshadow powder of the same color. This helps it last longer and prevent smudging.
Liquid liner brushes are applied w/ the applicators they come with. It is either a brush or felt/sponge tip. It is better to draw longer strokes because short strokes can build up layers of liner which could cause unevenness.
Eyeliner brushes
There are soo many kinds of eyeliner brushes, and you can use whatever kind you want, some are better for other purposes than others
-Push-liner/flat brush, good for push-lining powders, thin flatness can easily wing a liner out

-winged/angled liner brush, good for gel liners, and the wing can easily give a winged look

-small flat "V" pointed liner brush, good for gel liners

-angle liner brush, good for liquid or gel liners
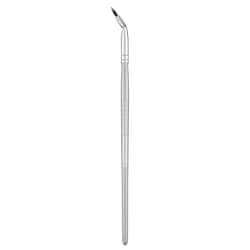
-round pointed liner brush, good for gel liners, but you can use it to smudge gel and powders too
 -long/thin liner brush, good for liquid liners

Lining the waterline(s)
You can choose to line your water line or tight-line which is lining the upper water line with pencil or certain gel eyeliners. This is done by many people because the dark liners will contrast with the whites of the eyes, making the eyes stand out more and appear larger and brighter. However, depending on your eyeshape, if you line your entire eye with a dark liner like black or dark brown, it can close off the eye and make it appear smaller (like me =/ )
Tight-lining alone gives one of the most natural liner looks. It involves lining the upper water line of your eyes and filling in the gaps in between your eyelashes. Bubzbeauty has a good tutorial on tight-lining: http://www.youtube.com/watch?v=Kp02tRP2XaI
You can also use an eyeshadow with a push-liner brush to fill in the gaps between the lashes and this also gives a very sweet and natural look. Gossmakeupartist has an excellent tutorial for push-lining: http://www.youtube.com/watch?v=IunkBu5L7z0
If you do not wish to apply eyeliner all around the eye but you want more than just the upper lash line, you can bring in eyeliner on the outer corner of the eye into the lower lashline and stop when it hits your iris. I really like to do this a lot because it makes my eyes look bigger but is not as noticeable as applying all around the eye. Cl2425 has a good tutorial for this method: http://www.youtube.com/watch?v=U_S2LIS5zSA
Personally, I don't like rimming the entire eye, not only because it makes my eyes appear smaller, but it is also too obvious. People naturally have a darker lashline on top, not on the bottom, so it is very easy to see and point out. It's the first thing I notice when I talk to a person, lol XP.
Also, there are many techniques for eyelining the top lashline/lid. If you have large double eyelids/large folds above your eyes, you can do whatever you want. However, it is more difficult for people with different folds or no folds to put on eyeliner that works for their eyelid. Therefore, I will be explaining more techniques for lining those kinds of eyes.
Eyeliner techniques for hooded eyes and monolids
hooded eyes:

 monolids:

If you have hooded eyes and monolids, stick with tight-lining and push-lining. This gives a very beautiful and natural effect. You don't need a lot of makeup to be beautiful =)
The reason why I am saying this, is for hooded eyes, the lid folds over your eyelid crease so if you applied eyeliner how others do, you and others wouldn't be able to see it. And you can have a stick residue when you close your eyes when the liner touches the folded skin.
The reason why I'm saying this for monolids is that to see a layer of eyeliner, you would need to put a thick layer of eyeliner on your eyes for you and others to see it. This is a problem because when you close your eyes, there is a ton of black eyeliner on your lids and that looks very unattractive.
Eyeliner techniques for small double lids

Small double eyeslids are crease that are largest at the outer corner of the eye and then quickly taper to a curved triangle at the inner corners of the eyes. So, I have small double eyelids. And like many others with the same fate, we realize that if we put too much eyeliner on the lid, it will make crease disappear and your eyes will appear smaller.
There are some ways to line the eyes for small double lids so that the crease line doesn't disappear.
-you can tight-line or push-line your eye
-you can put a very thin layer of eyeliner (like the picture above)
-you can put eyeliner on the outer corner of the eyes and then draw the liner in until it is halfway into the iris and stop there (which is what i do)
Tips and Tricks!
-when you are lining your eyes, try to get as close to the lashes as possible, if you are too high above your lashline you (and other people) can see a gap of skin in between the eyeliner and your lashline which looks weird
-if you are using any eyeliner, get a waterproof one, they last much longer and are less likely to smudge and smear
-if you like pencil lines, try to find one that does not tug on your eyelid so much so it won't irritate your skin and you won't get premature wrinkles!
-you can use a Q-tip to help you with your waterlines (such as lifting or lowering skin), it is a lot more gentle than your fingers and more clean
-if you want your pencil, powder or gel eyeliner to look more smokey and natural, you can smudge it out with a Q-tip or a smudge brush
-if you ever mess up on your eyeliner, don't panic! Take a bit moisturizer on your finger and press and roll a Q-tip into the moisturizer until it is full absorbed. Then gently wipe off the eyeliner. You don't want to use a dry Q-tip for this because it can tug on your skin, irritating it and creating premature wrinkles, and a dry Q-tip is more likely to smear your eyeliner on your skin.
And just because I'm talking about different kinds of eyes, does not mean that I think that big eyes are the best or any sort of annoying crap like that. Big eyes is a style and a makeup style, and so are elongated eyes which I like to do on myself. Asian eyes, white eyes, etc. doesn't matter okay, eyes are wonderful and they are wonderful canvases for a variety of makeup styles.You do whatever you want, I do whatever I want! =P So, be happy!
So, I hope you liked this post. It was very long and I probably didn't cover as much as I wanted to. But I hope these will help beginners who are just learning about eyeliner and give them a basic background to read upon.
Thank you for reading and I hoped this helped you.
If you have any questions or comments, feel free to write in the comment box below! =)
bye byee!
Today I will be talking about Eyeliner!

Eyeliner is a product that is used near the lash line to make your lashes appear, thicker, darker, and fuller. It is usually used to make the eyes appear bigger, rounder, and/or longer.
Do I need eyeliner?
Haha, nope! You don't have to use eyeliner if you don't want to. =) It's your preference! Some people like to make their eyes look bigger or give their eyes a more defined appearance.
Types of eyeliner
There are 3 main types of eyeliner: pencil, gel, and liquid. They all come in a variety of colors and can be matt or shimmery. You can also use eyeshadows to apply eyeliner!
In general pencil is the easiest to apply and liquid is the hardest. I wouldn't know, because I started off w/ liquid eyeliner =P.
However liquid and gel liners tend to last longer than pencil or powder/eyeshadow liners.
Pencil and eyeshadow give the most natural look while gel and liquid give a stronger, harder, and more defined look.
How to apply different types of eyeliners
Generally, you want to draw your eyeliner in a way that it is thicker on the outer corners of the eyes and thinner on the inner corners. This gives a more flirty and enlarging effect. You can also wing out your eyeliner to make it more flirty as well. Winging out the eyeliner is also great for older people because it helps lift and brighten the eyes.
If you want something more natural, stick with a thin liner that doesn't change much in thickness and stop where your eyelashes stop.
Pencil eyeliners are of course applied with the pencil. If you are comfortable with this, you can draw long strokes however if you are new, shorter smaller strokes work just as well. Just stay in a uniform direction and take your time =) You will learn fast! I have seen people melt their pencil eyeliners with a blow dryer and use an eyeliner brush to apply the pencil liner in a more gel form.
Gel liners are applied with eyeliner brushes or a Q-tip. When you use an eyeliner brush with a gel, it doesn't matter what kind of brush it is, just make sure to use small gentle strokes and gradually connect them together. Some people like to use a Q-tip for the lower lash line because it gives a softer look. Many people also set their gel liner with an eyeshadow powder of the same color. This helps it last longer and prevent smudging.
Liquid liner brushes are applied w/ the applicators they come with. It is either a brush or felt/sponge tip. It is better to draw longer strokes because short strokes can build up layers of liner which could cause unevenness.
Eyeliner brushes
There are soo many kinds of eyeliner brushes, and you can use whatever kind you want, some are better for other purposes than others
-Push-liner/flat brush, good for push-lining powders, thin flatness can easily wing a liner out
-winged/angled liner brush, good for gel liners, and the wing can easily give a winged look
-small flat "V" pointed liner brush, good for gel liners
-angle liner brush, good for liquid or gel liners
-round pointed liner brush, good for gel liners, but you can use it to smudge gel and powders too
Lining the waterline(s)
You can choose to line your water line or tight-line which is lining the upper water line with pencil or certain gel eyeliners. This is done by many people because the dark liners will contrast with the whites of the eyes, making the eyes stand out more and appear larger and brighter. However, depending on your eyeshape, if you line your entire eye with a dark liner like black or dark brown, it can close off the eye and make it appear smaller (like me =/ )
Tight-lining alone gives one of the most natural liner looks. It involves lining the upper water line of your eyes and filling in the gaps in between your eyelashes. Bubzbeauty has a good tutorial on tight-lining: http://www.youtube.com/watch?v=Kp02tRP2XaI
You can also use an eyeshadow with a push-liner brush to fill in the gaps between the lashes and this also gives a very sweet and natural look. Gossmakeupartist has an excellent tutorial for push-lining: http://www.youtube.com/watch?v=IunkBu5L7z0
If you do not wish to apply eyeliner all around the eye but you want more than just the upper lash line, you can bring in eyeliner on the outer corner of the eye into the lower lashline and stop when it hits your iris. I really like to do this a lot because it makes my eyes look bigger but is not as noticeable as applying all around the eye. Cl2425 has a good tutorial for this method: http://www.youtube.com/watch?v=U_S2LIS5zSA
Personally, I don't like rimming the entire eye, not only because it makes my eyes appear smaller, but it is also too obvious. People naturally have a darker lashline on top, not on the bottom, so it is very easy to see and point out. It's the first thing I notice when I talk to a person, lol XP.
Also, there are many techniques for eyelining the top lashline/lid. If you have large double eyelids/large folds above your eyes, you can do whatever you want. However, it is more difficult for people with different folds or no folds to put on eyeliner that works for their eyelid. Therefore, I will be explaining more techniques for lining those kinds of eyes.
Eyeliner techniques for hooded eyes and monolids
hooded eyes:


If you have hooded eyes and monolids, stick with tight-lining and push-lining. This gives a very beautiful and natural effect. You don't need a lot of makeup to be beautiful =)
The reason why I am saying this, is for hooded eyes, the lid folds over your eyelid crease so if you applied eyeliner how others do, you and others wouldn't be able to see it. And you can have a stick residue when you close your eyes when the liner touches the folded skin.
The reason why I'm saying this for monolids is that to see a layer of eyeliner, you would need to put a thick layer of eyeliner on your eyes for you and others to see it. This is a problem because when you close your eyes, there is a ton of black eyeliner on your lids and that looks very unattractive.
Eyeliner techniques for small double lids

Small double eyeslids are crease that are largest at the outer corner of the eye and then quickly taper to a curved triangle at the inner corners of the eyes. So, I have small double eyelids. And like many others with the same fate, we realize that if we put too much eyeliner on the lid, it will make crease disappear and your eyes will appear smaller.
There are some ways to line the eyes for small double lids so that the crease line doesn't disappear.
-you can tight-line or push-line your eye
-you can put a very thin layer of eyeliner (like the picture above)
-you can put eyeliner on the outer corner of the eyes and then draw the liner in until it is halfway into the iris and stop there (which is what i do)
Tips and Tricks!
-when you are lining your eyes, try to get as close to the lashes as possible, if you are too high above your lashline you (and other people) can see a gap of skin in between the eyeliner and your lashline which looks weird
-if you are using any eyeliner, get a waterproof one, they last much longer and are less likely to smudge and smear
-if you like pencil lines, try to find one that does not tug on your eyelid so much so it won't irritate your skin and you won't get premature wrinkles!
-you can use a Q-tip to help you with your waterlines (such as lifting or lowering skin), it is a lot more gentle than your fingers and more clean
-if you want your pencil, powder or gel eyeliner to look more smokey and natural, you can smudge it out with a Q-tip or a smudge brush
-if you ever mess up on your eyeliner, don't panic! Take a bit moisturizer on your finger and press and roll a Q-tip into the moisturizer until it is full absorbed. Then gently wipe off the eyeliner. You don't want to use a dry Q-tip for this because it can tug on your skin, irritating it and creating premature wrinkles, and a dry Q-tip is more likely to smear your eyeliner on your skin.
And just because I'm talking about different kinds of eyes, does not mean that I think that big eyes are the best or any sort of annoying crap like that. Big eyes is a style and a makeup style, and so are elongated eyes which I like to do on myself. Asian eyes, white eyes, etc. doesn't matter okay, eyes are wonderful and they are wonderful canvases for a variety of makeup styles.You do whatever you want, I do whatever I want! =P So, be happy!
So, I hope you liked this post. It was very long and I probably didn't cover as much as I wanted to. But I hope these will help beginners who are just learning about eyeliner and give them a basic background to read upon.
Thank you for reading and I hoped this helped you.
If you have any questions or comments, feel free to write in the comment box below! =)
bye byee!
Review on Eucerin Calming Creme =)
Hi Everybody! =) Earlier this week, I talked about Oatmeal helping my sunburns.
Today I will review and talk about a moisturizer that helped my sunburnt skin after washing it with oatmeal, the Eucerin Calming Cream Daily Moisturizer:
 This product can be found at any drugstore. It comes in a variety of sizes and I own the travel size. Whatever size it is, the Eucerin brand is very affordable. I believe the cost of this one in the picture is around $12-$14 for 14 oz or 396 grams of product. Very affordable for the amount of product in it.
This moisturizer has oatmeal extracts and is made for people with dry itchy skin. It helps calm and relieve the irritation and dryness. It is fragrance free and has no dyes.
What do I think of this product?
When I got sunburned, my skin was red and irritated. I wanted to scratch but I knew I shouldn't! It drove me crazy! DX I bought this moisturizer as a hand and body moisturizer a while ago and decided to try it to help my sunburned skin. This product felt amazing! My itchiness was gone and my skin was less dry and didn't have the "stretched" feeling to it. As my skin began to heal, it became more dry and itchy but this product really helped moisturize and calm my skin. When my dead skin began to peel, this moisturizer helped make the dead skin less apparent and ugly looking and it prevented my new skin from getting stretched and scaly looking as dead skin became white and dry. Because of this moisturizer, I did not scratch my irritated skin and my clothes did not chaff and irritate my sunburned skin. This product also really helped moisturized the new skin that was growing and prevented it from becoming dehydrated and damaged.
I still continue to use this moisturizer on my body even though my burns have already been healed and gone. It is a great moisturizer! =D It is lightweight and the consistency is smooth. It does not feel sticky or greasy on my skin.
Do I recommend this product?
If you have itchy and dry hands and body skin, I recommend this product! It works well, can be found easily, and is affordable. This is also great for relieving the dryness and itchiness of sunburned skin and help prevent the peeling dead skin from looking so scaly and obvious. Just make sure to apply it onto your sunburn gently. Also, if you are looking for an everyday hand and body moisturizer that you can carry around in travel size or have a larger tube at home, this is a great product to try!
I do not know if this moisturizer works on the face, I have never tried and the tube does not say, so I don't think this product should be used on the face, especially if you have sensitive skin. Their website has products for the face only and it is not included in them. If you want a calming moisturizer for sensitive and/or dry facial skin please look at my review on the Aveeno Baby Daily Moisture Lotion! =)
So I hoped you liked this review ^_^ If you have any questions or comments, feel free to write in the comment box below!
Thanks for reading and have a great day! Or night =P
Today I will review and talk about a moisturizer that helped my sunburnt skin after washing it with oatmeal, the Eucerin Calming Cream Daily Moisturizer:
This moisturizer has oatmeal extracts and is made for people with dry itchy skin. It helps calm and relieve the irritation and dryness. It is fragrance free and has no dyes.
What do I think of this product?
When I got sunburned, my skin was red and irritated. I wanted to scratch but I knew I shouldn't! It drove me crazy! DX I bought this moisturizer as a hand and body moisturizer a while ago and decided to try it to help my sunburned skin. This product felt amazing! My itchiness was gone and my skin was less dry and didn't have the "stretched" feeling to it. As my skin began to heal, it became more dry and itchy but this product really helped moisturize and calm my skin. When my dead skin began to peel, this moisturizer helped make the dead skin less apparent and ugly looking and it prevented my new skin from getting stretched and scaly looking as dead skin became white and dry. Because of this moisturizer, I did not scratch my irritated skin and my clothes did not chaff and irritate my sunburned skin. This product also really helped moisturized the new skin that was growing and prevented it from becoming dehydrated and damaged.
I still continue to use this moisturizer on my body even though my burns have already been healed and gone. It is a great moisturizer! =D It is lightweight and the consistency is smooth. It does not feel sticky or greasy on my skin.
Do I recommend this product?
If you have itchy and dry hands and body skin, I recommend this product! It works well, can be found easily, and is affordable. This is also great for relieving the dryness and itchiness of sunburned skin and help prevent the peeling dead skin from looking so scaly and obvious. Just make sure to apply it onto your sunburn gently. Also, if you are looking for an everyday hand and body moisturizer that you can carry around in travel size or have a larger tube at home, this is a great product to try!
I do not know if this moisturizer works on the face, I have never tried and the tube does not say, so I don't think this product should be used on the face, especially if you have sensitive skin. Their website has products for the face only and it is not included in them. If you want a calming moisturizer for sensitive and/or dry facial skin please look at my review on the Aveeno Baby Daily Moisture Lotion! =)
So I hoped you liked this review ^_^ If you have any questions or comments, feel free to write in the comment box below!
Thanks for reading and have a great day! Or night =P
Review on Shiseido Extra Hair Pack
Hi Everbody! =)
Today I am reviewing the Shiseido Extra Hair Pack:
 This product is a hair mask. It contains 220 grams of product. You can buy it in the Japanese markets Mitsuwa or Marukai. You can also find it online such as on Amazon. It is about $20.
Directions: After rinsing with shampoo, massage into hair and leave in for 10-15 minutes, then rinse. Use 1-2 times a week.
What I do: Well, I don't have a lot of time in the shower, and I can't just spend an extra 10-15 minutes in there! XD I have stuff to do! So, what I do is that when I take my evening showers once a week, I spray water into my hair until it is damp. Then I spread the product into the lower half of my hair, concentrating on the ends of my hair. The ends of my hair are the most dry and fragile, therefore it needs more care! Then I tie my hair into a bun and leave it in for about 30 min because it takes longer for non-washed hair to absorb the moisture and then I rinse it out in the shower.
What do I think of this product?
I heard about this product from Beautifymeeh and bought it on Amazon to try it. Like she says it has a really nice fragrance =) The product is very creamy and smooth. I think it works very well! It makes my hair a lot softer and smoother. Because my hair has absorbed extra moisture it feels thicker and becomes healthier and shinier. The price does bother me a little bit, it is more on the pricy side. However, I only use this once a week and so far it has lasted for more than 2 months and there is still quite a bit of product inside. Over time I have seen a difference in my hair. My hair used to be more dry and scraggly looking, especially at the ends of my hair and I really disliked that. However, this product has really helped moisturize my hair, which is great because I'm planning to grow my hair very very long! The ends of my hair are not longer dry and my hair feels soooo soft! My bf likes that too ;P.
Do I recommend this product?
Yes! I recommend this product! Especially if you have thin hair that is easily damaged, or dry hair that needs more moisture, this product is great to try! I really love the smell and feel of my hair after using this product, it works so well. =) I also recommend this for people who want to grow out their hair long. If you take care of the ends of your hair, they will be less damaged, have less split ends, and will last longer with less trimming. (But trimming the ends is still important!)
Try to use this product on the lower half of your hair only or as little product on the upper half. The top part of your hair is the newest, strongest and healthiest hair, therefore it doesn't necessarily need all the extra moisture. If you do use it on top of your head you may make your head very greasy or the extra moisture from the hair mask will make your hair heavy and weigh it down so that you have less volume on your head.
So I hope this post was helpful to you! Since summer is coming, the days are getting hotter and dryer and the heat from the sun and dry air can really dry out and damage hair. I know because my hair is fine and thin, so I want to keep it moisturized!
Thank you for reading and I will see you later! =)
Today I am reviewing the Shiseido Extra Hair Pack:
Directions: After rinsing with shampoo, massage into hair and leave in for 10-15 minutes, then rinse. Use 1-2 times a week.
What I do: Well, I don't have a lot of time in the shower, and I can't just spend an extra 10-15 minutes in there! XD I have stuff to do! So, what I do is that when I take my evening showers once a week, I spray water into my hair until it is damp. Then I spread the product into the lower half of my hair, concentrating on the ends of my hair. The ends of my hair are the most dry and fragile, therefore it needs more care! Then I tie my hair into a bun and leave it in for about 30 min because it takes longer for non-washed hair to absorb the moisture and then I rinse it out in the shower.
What do I think of this product?
I heard about this product from Beautifymeeh and bought it on Amazon to try it. Like she says it has a really nice fragrance =) The product is very creamy and smooth. I think it works very well! It makes my hair a lot softer and smoother. Because my hair has absorbed extra moisture it feels thicker and becomes healthier and shinier. The price does bother me a little bit, it is more on the pricy side. However, I only use this once a week and so far it has lasted for more than 2 months and there is still quite a bit of product inside. Over time I have seen a difference in my hair. My hair used to be more dry and scraggly looking, especially at the ends of my hair and I really disliked that. However, this product has really helped moisturize my hair, which is great because I'm planning to grow my hair very very long! The ends of my hair are not longer dry and my hair feels soooo soft! My bf likes that too ;P.
Do I recommend this product?
Yes! I recommend this product! Especially if you have thin hair that is easily damaged, or dry hair that needs more moisture, this product is great to try! I really love the smell and feel of my hair after using this product, it works so well. =) I also recommend this for people who want to grow out their hair long. If you take care of the ends of your hair, they will be less damaged, have less split ends, and will last longer with less trimming. (But trimming the ends is still important!)
Try to use this product on the lower half of your hair only or as little product on the upper half. The top part of your hair is the newest, strongest and healthiest hair, therefore it doesn't necessarily need all the extra moisture. If you do use it on top of your head you may make your head very greasy or the extra moisture from the hair mask will make your hair heavy and weigh it down so that you have less volume on your head.
So I hope this post was helpful to you! Since summer is coming, the days are getting hotter and dryer and the heat from the sun and dry air can really dry out and damage hair. I know because my hair is fine and thin, so I want to keep it moisturized!
Thank you for reading and I will see you later! =)
Tuesday, June 5, 2012
Oatmeal for Skincare and Sunburns
Hi Everyone!
Today I will talk about washing your skin with oatmeal and its beneficial properties for the health of your skin! And then I will talk about how oatmeal helped my sunburns =O
I have been using oatmeal to wash my face for a while, about a year I think..wow a year...I'm old XD.
I first started after watching Bubzbeauty talk about washing her face with oatmeal on Youtube.
Here is the link to her video: http://www.youtube.com/watch?v=7e5_RVBwNjE
In this video she explained the benefits of washing one's face with 100% natural oatmeal!
Oatmeal has anti-inflammatory properties and relieves, dryness, irritation and redness. Aveeno is very well know for using oatmeal extracts to help calm irritated skin. The oatmeal grains themselves act as a good gentle exfoliator.
Since my skin is very sensitive and parts of it are very dry, I tend to get a lot of redness and irritation on my face, which not only looks bad, but it feels annoying too. Therefore, after watching Bubzbeauty's video I decided to give it a try! I followed Bubzbeauty's instructions and changed them to my preferences.
How I do it:
1) I only wash my face or body with oatmeal in the shower, because I am a pretty messy face washer already....so...=P
2) I grab a handful of 100% natural oatmeal and put it in a cup and bring it into the shower
3) I pour water into the cup of oatmeal until there is a little extra water on top (kind of like how you make cup ramen!)
4) Then I do other things in the shower like wash my hair while I let the oatmeal absorb water so it can soften. Before you use it, press it and make sure that the oatmeal fully absorbs water. Because if it doesn't, it's going to feel scratchy on your skin (which has happened to me before....)
5) Then I follow Bubzbeauty's instructions on how to use the wet oatmeal and I'm done! =)
What do I think of this skincare method?
Nowadays I use this on weekends to give my face a break from man-made skincare products. I think it is amazing! My skin definitely feels a lot softer and more hydrated! The oatmeal really helped with the irritation and redness of my sensitive skin and I love it!!! XD The oat grains gently exfoliate my skin and I don't have to be worried about chemical irration because it is 100% natural oatmeal! =)
I definitely recommend this for people of all skin types and all ages. The benefits are worth it! And besides, you can find oatmeal anywhere and it's cheap! XP
I have bought 2 kinds of oatmeal:

On the left is Quaker Oats: Old Fashioned and on the right is Quaker Oats: Quick-1 minute.
Both in the ingredients list say: 100% natural oats and appear to be the same.
If you see these at the store and you want to buy one for your face, please get the Quaker Oats: Quick-1 minute! Please do!
The difference between the two is that even though they are both 100% natural oats, the Old Fashioned brand is steel cut oats which are a lot thicker and harder than the Quick-1 minute oats. The Quick-1 minute oats have been pre-pressed and softened by a steel roller.
The Old Fashioned brand will actually scratch your skin when you use it because it is more difficult for it to absorb water and you would probably have to wait twice as long for it to soften. Especially if you are a person like me who doesn't have a lot of time and gets impatient, you will end up hurting your skin! So please go buy the Quick-1 minute brand! Trust me! I've used both and I know how different they feel!
How Oatmeal helped my Sunburn!
So, earlier this month I went hiking and I didn't put sunscreen on my shoulders....yes, stupid I know. (I wanted a tan and I've never been sunburned before, I usually get tanned a lot so I thought it was okay not to put sunscreen.) I got a pretty bad sunburn on my shoulders =/
After the sunburned healed, the skin felt dry and itchy. I thought, if oatmeal helps with irritation on my face, then it should also help the rest of my skin too! Therefore, I tried the same method on my shoulders. The result? It was awesome! XD It really soothed and moisturized my skin. My skin became less irritated and itchy. My shoulders didn't start peeling until about a week later, and the exfoliating properties of the oats also helped with gently taking off the dead skin!
So, if you ever get a sunburn and you want to relieve your painful itching and dryness, I recommend this method! Just make sure to read the Important notes and use your common sense!
Important notes:
1) Use this method only AFTER your sunburn has healed. If your sunburn still stings and burns to the touch, it's not healed yet. If you use this when your sunburn has not healed, it will hurt.
2) If you leave the oatmeal and water in a cup alone until it has cooled, it feels very refreshing on the skin
3) When you use the oatmeal to exfoliate, make sure it is soft to the touch, fully absorbed with water, and be gentle on your sunburnt skin, even if it has already healed
I hope this post was helpful to everyone, especially to those with sensitive skin. I understand it is worrisome to try new skincare products that say that they are for or help sensitive skin, but because you have sensitive skin, it could still react negatively to the product. However, 100% natural oatmeal has no chemicals or synthetic substances of any kind, therefore your skin will probably not react to it unless you are allergic to oatmeal or something. =P
Thank you for reading! If you have an questions or comments, feel free to post in the comment box below! ^_^
Today I will talk about washing your skin with oatmeal and its beneficial properties for the health of your skin! And then I will talk about how oatmeal helped my sunburns =O
I have been using oatmeal to wash my face for a while, about a year I think..wow a year...I'm old XD.
I first started after watching Bubzbeauty talk about washing her face with oatmeal on Youtube.
Here is the link to her video: http://www.youtube.com/watch?v=7e5_RVBwNjE
In this video she explained the benefits of washing one's face with 100% natural oatmeal!
Oatmeal has anti-inflammatory properties and relieves, dryness, irritation and redness. Aveeno is very well know for using oatmeal extracts to help calm irritated skin. The oatmeal grains themselves act as a good gentle exfoliator.
Since my skin is very sensitive and parts of it are very dry, I tend to get a lot of redness and irritation on my face, which not only looks bad, but it feels annoying too. Therefore, after watching Bubzbeauty's video I decided to give it a try! I followed Bubzbeauty's instructions and changed them to my preferences.
How I do it:
1) I only wash my face or body with oatmeal in the shower, because I am a pretty messy face washer already....so...=P
2) I grab a handful of 100% natural oatmeal and put it in a cup and bring it into the shower
3) I pour water into the cup of oatmeal until there is a little extra water on top (kind of like how you make cup ramen!)
4) Then I do other things in the shower like wash my hair while I let the oatmeal absorb water so it can soften. Before you use it, press it and make sure that the oatmeal fully absorbs water. Because if it doesn't, it's going to feel scratchy on your skin (which has happened to me before....)
5) Then I follow Bubzbeauty's instructions on how to use the wet oatmeal and I'm done! =)
What do I think of this skincare method?
Nowadays I use this on weekends to give my face a break from man-made skincare products. I think it is amazing! My skin definitely feels a lot softer and more hydrated! The oatmeal really helped with the irritation and redness of my sensitive skin and I love it!!! XD The oat grains gently exfoliate my skin and I don't have to be worried about chemical irration because it is 100% natural oatmeal! =)
I definitely recommend this for people of all skin types and all ages. The benefits are worth it! And besides, you can find oatmeal anywhere and it's cheap! XP
I have bought 2 kinds of oatmeal:

On the left is Quaker Oats: Old Fashioned and on the right is Quaker Oats: Quick-1 minute.
Both in the ingredients list say: 100% natural oats and appear to be the same.
If you see these at the store and you want to buy one for your face, please get the Quaker Oats: Quick-1 minute! Please do!
The difference between the two is that even though they are both 100% natural oats, the Old Fashioned brand is steel cut oats which are a lot thicker and harder than the Quick-1 minute oats. The Quick-1 minute oats have been pre-pressed and softened by a steel roller.
The Old Fashioned brand will actually scratch your skin when you use it because it is more difficult for it to absorb water and you would probably have to wait twice as long for it to soften. Especially if you are a person like me who doesn't have a lot of time and gets impatient, you will end up hurting your skin! So please go buy the Quick-1 minute brand! Trust me! I've used both and I know how different they feel!
How Oatmeal helped my Sunburn!
So, earlier this month I went hiking and I didn't put sunscreen on my shoulders....yes, stupid I know. (I wanted a tan and I've never been sunburned before, I usually get tanned a lot so I thought it was okay not to put sunscreen.) I got a pretty bad sunburn on my shoulders =/
After the sunburned healed, the skin felt dry and itchy. I thought, if oatmeal helps with irritation on my face, then it should also help the rest of my skin too! Therefore, I tried the same method on my shoulders. The result? It was awesome! XD It really soothed and moisturized my skin. My skin became less irritated and itchy. My shoulders didn't start peeling until about a week later, and the exfoliating properties of the oats also helped with gently taking off the dead skin!
So, if you ever get a sunburn and you want to relieve your painful itching and dryness, I recommend this method! Just make sure to read the Important notes and use your common sense!
Important notes:
1) Use this method only AFTER your sunburn has healed. If your sunburn still stings and burns to the touch, it's not healed yet. If you use this when your sunburn has not healed, it will hurt.
2) If you leave the oatmeal and water in a cup alone until it has cooled, it feels very refreshing on the skin
3) When you use the oatmeal to exfoliate, make sure it is soft to the touch, fully absorbed with water, and be gentle on your sunburnt skin, even if it has already healed
I hope this post was helpful to everyone, especially to those with sensitive skin. I understand it is worrisome to try new skincare products that say that they are for or help sensitive skin, but because you have sensitive skin, it could still react negatively to the product. However, 100% natural oatmeal has no chemicals or synthetic substances of any kind, therefore your skin will probably not react to it unless you are allergic to oatmeal or something. =P
Thank you for reading! If you have an questions or comments, feel free to post in the comment box below! ^_^
Sunday, June 3, 2012
Review on Burt's Bee Tinted Lipbalm! =)
Hi Everyone!
Today I will be reviewing Burt's Bees Tinted Lip Balms:


Today I will be reviewing Burt's Bees Tinted Lip Balms:

These tinted lip balms can be found at any drugstore, at Ulta, or online. They are about $7-$8 each. And come in a variety of colors! (honeysuckle, pink blossom, rose, tiger lily, hibiscus, red dahlia)

They are said to be 100% natural, made from shea butter, coconut oil, botanical waxes, and olive oil. They say that their colors are sheer. Swatches are at the end of the post!
What do I think of this product?
I really like these lip balms! Especially because they tint my lips with color! I was kind of unsure in the beginning to buy such a pricy lip balm. I know that the brand is well known and popular but I wondered if it was worth it. I decided to go for it, and it was a great decision! =D
I have 2 of them: Tiger Lily and Pink Blossom.
I think the texture is good. It does not feel slippery or sticky on my lips and does not smear. I think, for its function as a lipbalm, it's good as well. My lips are well hydrated and don't feel dry or cracked after use. I do need to reapply throughout the day, but that's not a big issue.
The color, I personally think, is stronger than what they say. It's not that sheer, it's more pigmented in a good way. ^_^ Although, if you have darker lips, they may look sheer on your lips. However, my lips are pretty pale, they actually almost match my skin color (unless i'm eating spicy food lol). I like the pigmentation on my lips, they are not too strong like lipstick but not as sheer as a lip gloss.
Tiger Lily is an orange-based neutral lip color. I think this color goes well with a variety of makeup and it has a light and fun feel to it. Pink Blossom, is a great pink color. It is really pink, as in, I would call it the perfect pink color! This is a little stronger than Tiger Lily and shows up very well on my lips. It gives me a sweeter and more girly look. ^_~
These lip balms are hydrating and long lasting. I think I've had them for more than 3 months and I'm not even halfway yet. However, I don't use them everyday.
I'm also not sure if mine are broken or not, because once I screw the stick higher, it won't go down when I try to screw it back down. Which is kind of annoying =/, I need to be careful and not screw the stick too high otherwise it'll get messy.
Also, these lip balms tend to melt very easily, so always keep them in a relatively cool, dry place. A purse or backpack is fine. Don't leave it in a hot car, it will melt, that's what happened to a friend of mine =P
Do I recommend this product?
If you don't mind the price, then yes! I do recommend this product as a good product to try, especially if you are looking for a tinted lip balm! What I like most about it is that it tints my lips well! If you just want a regular lip balm or chapstick, go for something cheaper XP.
Lipbalms that I own:
I have Tiger Lily and Pink Blossom.


While the swatches look rather sheer on my hand, for some reason, they are much more pigmented on my lips. I don't know why =P.
I hope you liked this review! Thank you for reading and I will see you later! =)
Review on L'oreal Telescopic Waterproof Eyeliner!
Hi guys! Today I will be reviewing the L'oreal Telescopic Waterproof Eyeliner:
This is a waterproof liquid eyeliner. The one I am reviewing is the old version of the L'oreal Telescopic Eyeliner with the blue applicator. (Don't get the new versions that don't have the blue color [i think they're a gold color or something], they suck and the applicator tip is stiff, uncomfortable, and therefore sucks!)


This eyeliner comes in 2 colors, black and brown. Each eyeliner contains 0.06 fluid oz or 2mL of product. It is about $7-$9 and can be found at any drugstore and at Ulta. It has a felt/sponge tip applicator: (Brown is on the left and Black is on the right)


This is a waterproof liquid eyeliner. The one I am reviewing is the old version of the L'oreal Telescopic Eyeliner with the blue applicator. (Don't get the new versions that don't have the blue color [i think they're a gold color or something], they suck and the applicator tip is stiff, uncomfortable, and therefore sucks!)
This eyeliner comes in 2 colors, black and brown. Each eyeliner contains 0.06 fluid oz or 2mL of product. It is about $7-$9 and can be found at any drugstore and at Ulta. It has a felt/sponge tip applicator: (Brown is on the left and Black is on the right)


I will post swatches at the end of the post! =)
What do I think of this product?
This was the 1st eyeliner I bought in my life and the first one I ever used. (Yes, haha, I started off with liquid eyeliner XP). This was introduced to me by a friend beginning of sophomore year, so I have been using this product for about 1.5 years. I have both the black and the brown eyeliner and I think they both work very well!
The felt tip may feel a bit hard in the beginning, but it quickly breaks it. Even though I know that liquid liners are the most difficult eyeliner to apply, the felt/sponge applicator still gives it some structure unlike brush applicators, so they won't be as flexible and unsteady as brush applicators.
Even though the swatches show a difference in the color, from asking my friends, they usually can't tell the difference between the brown and the black, they are both very dark. I prefer brown because it looks more natural.
This eyeliner can give a very clean and defined finish. It is easy to make thick or thin lines. When you first apply it, it may look glossy/shiny but after it dries it doesn't have that look anymore, so it is more of a matt finish. The formula is very smooth but it is not too dry that it clumps and not too liquid-y that it drips. It also applies a light even coat, which is great because you don't want a thick layer of anything on your eyes or face.
Also, because it is a waterproof formula, this eyeliner lasts for a really long time, I've worn it the whole day with no problem. Sometimes at the end of the day, it starts cracking a little bit from the movement of the eyes, but it doesn't flake and stays on well. I've worn this in the rain and worn it to dances and clubs with no smudging, or flaking, or smearing! =)
With constant, almost everyday use, this eyeliner lasts for a while, I'd say about 6 months, which is pretty good for a drugstore brand. Before you apply it, you shake it and you hear the mixer click inside. I've also left this on the shelf without use for 2-3 months before and it still works! Just shake it a little longer and the formula is still good.
The only 1 problem that I can find, if I am really picky, is that the inside edge of the container can tend to start drying up. As you pull the applicator out over and over again, the inside edge gets exposed to air and everytime you pull it out, a layer of eyeliner dries on top, which can bother some people. It doesn't really bother me, it never clogs the container and comes out by itself later and I just throw it away, and it also takes some time to build up.
Do I recommend this product?
Yes! If you like or don't mind using liquid eyeliners, I recommend this product! =) Especially since this one is waterproof! It is very very affordable for eyeliners and easy to find.
If you are a beginner at makeup, and you would like to try a decent liquid eyeliner, I recommend this one because it's cost is so low, that if you don't like it, it won't hurt your budget that badly and the felt tip applicator allows you more control and also allows you to do smaller, shorter strokes. This means that you can take it easy and you don't have to line the eye in one go!
Swatches!
Brown is top and Black is bottom. The colors are very dark and almost similar looking. I've asked my friends which color I've used and to them it looks the same =P. Even though I can tell the difference haha.

The eyeliner may look glossy in the picture but that's because I have a strong lamp light shining on it. On your eyelids, it won't look like this.
So I hope you enjoyed this review! If you have any questions or comments, feel free to write in the comment box below! I am happy to help or talk to you in any way =)
Thank you for reading and have a great day!
Subscribe to:
Posts (Atom)